How to Collect Logs from CB2000
NOTE: You may need more than one log set type for a case. For example, if the customer had a spontaneous reboot of a Windows host, we would need a getconfig and SVP logs. If the customer had an HVM Virtual Server crash, then we would need a getconfig of that host type when it comes back up, and the HVM dump (which would come with an SVP dump). Please use your best judgment for which log would apply to your specific open ticket.
All procedures can be run with the customer's credentials.
Please disable any web browser popup blockers during the log collection procedure and file upload.
You can get logs from the following parts in the chassis:
- Server blade.
- Chasis SVP.
Operating System Getconfigs:
- Windows = Windows getconfig
- Linux = UNIX getconfig
- VMWare ESX = VMWare getconfig
- (HVM) Hitachi Virtage Manager - (See Below)
IP Switches:
- Telnet to the switch
- Enable log capture for Putty, TeraTerm or any other telnet application you might be using.
- Run "show tech-support"
- Save the output of the text to a log file
FC Switches:
- These are standard Brocade switches. The Brocade FC data collection applies.
Chassis Data Collection -- Step 1:
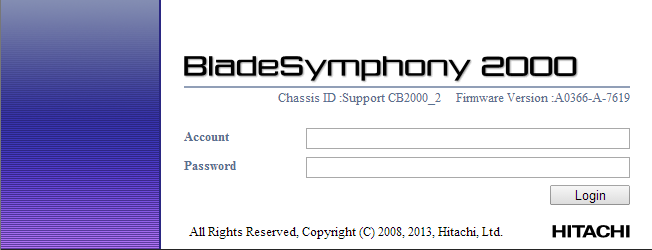
The easiest way to gather logs from the SVP is through its web interface. Like the AMS, use the IP to get there. Once there, the navigation is as follows:
SVP Web interface -> Maintenance Tab -> Log -> Dump Log (all management modules and partitions) -> download.
This will launch a pop-up (just like the AMS), and the resulting file will end in a ".dmp".


Chassis Data Collection - - Step 2 (Alternate Method):
The second method of getting the logs from the SVP is via the CLI. This may be faster for the customer depending on the situation, or necessary if they are unable to access the web interface.
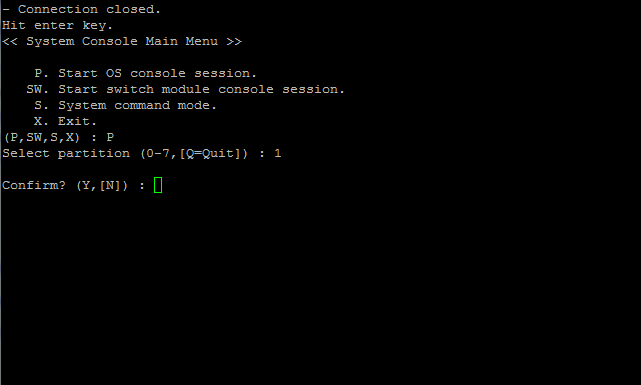
Telnet/SSH to the customer management port IP address -> "S" to enter the SVP, "DL" for Download Logs, "D" for dump logs to file.
Use EX Command to return to Main Menu.
Use HE Command to get a list of available commands
4601RZ0 00003(1)SVP>DL
<< DL - Log. >>
-- Log menu --
S. Show SVP log.
E. Show system event log.
D. Dump log to file.
P. Show power monitoring log.
M. Show environment monitoring log.
A. Show management module console access log.
F. Create error log file.
I. Show MARLOG.
C. Show RC list.
Q. Quit.
(S,E,D,P,M,A,F,I,C,[Q]) : D
Select module (P=Partition,M=Management module,A=All,[Q=Quit]) : A
WARNING : If confirm, it will take a few minutes to dump the log to the file.
Confirm? (Y,[N]) :
Once completed, the logs can be found on the SVP. You will need to connect to the SVP via FTP to obtain the logs, using an FTP application such as FileZilla.
The file to be located and uploaded to TUF will be similar to what you see below:

HVM Log Collection:
The following shows the procedure for storing and obtaining the LPAR manager dump into and from SVP on the LP screen:
[LPAR manager dump collection procedure]
- In order to get in the HVM screen, you must connect to the SVP again and enter the command "P".
- Enter the partition number that is running HVM.
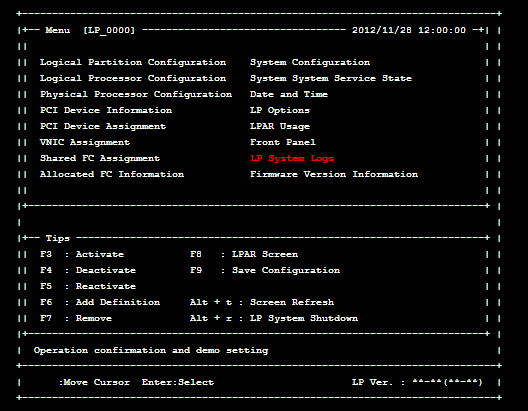
- If the blade is running HVM then you will be shown the main window.


(1) Select "LP Options" on the LP screen.

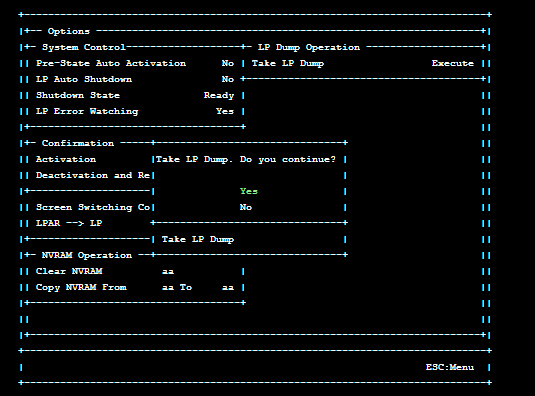
(2) Pressing the [Enter] key for "Execute" of "Take LP Dump" displays the subscreen. Select "Yes."

(3) Make sure that "Completed. Please check LP System Logs screen" has appeared.

(4) In the above operation, it takes two or three minutes until the LPAR manager dump is stored in SVP.
(5) Press the [Esc] key to return to the LP screen.
(6) Select "LP System Logs."

(7) Press the [Enter] key for the level selection portion in the upper right of the screen.

(8) The subscreen appears. Select "Error/Warn./Info."

(9) Make sure that the level selection indicates "All Level."

(10) Make sure that two "LP dump transfer succeeded." events are obtained around the time when the LP dump was obtained. If no events are displayed, contact the support section.

(11) According to the Dump Collection (Case 1) procedure, obtain the LP dump stored in SVP.
Note: To obtain two or more dumps, repeat steps (1) to (10).
When the HVM dump is complete, then you must go back and follow STEP 1 of the "Chassis Data Collection".
